I started this post about a week ago, but then I got sick (again) and never got around to finishing it, so here we go!
Pasta Sauce:
I have made my own pasta sauce for a few years now, and have always frozen it in bags. Now that Alex and I are in our apartment, we no longer have the giant extra freezer in the garage that we had at my parents house. For that reason, I have not made pasta sauce in the year+ that we have lived here. That hasn't really bothered me, but Alex really likes my pasta sauce. Personally I am perfectly fine with jarred sauce (of any brand) but it makes him happy and hey rule #32 - Enjoy the little things. So when we saw 20lbs of organic tomatoes for $8 at our local produce stand, I knew that it was time to give in.
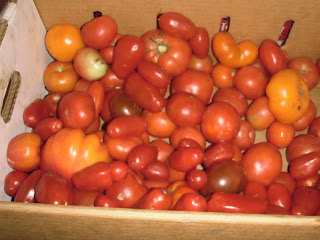
First you will need: approx 20lbs of tomatoes (we picked ours from the "almost too smushy to sell" pile and were just told to fill the box. We are friends with the family who runs the produce stand and didn't want to risk taking too many, so I think we got under 20lbs. I'm glad we did though, because my pot was filled to capacity). This picture is also taken after one or two batches had been shocked and peeled. We had a combination of different heirloom tomatoes, beef steak, purple cherokees, and romas.
You will also need:
* Red, yellow, and orange bell peppers (I have more yellow than orange and red because they were cheapest). The number of peppers is completely dependent on your flavor preferences. I like the taste of sweet bell peppers with tomatoes, if you don't like them feel free to omit.
* Shallots (or onion). I think we used half of the shallots in the picture. I prefer cooking with shallots because they don't bother my eyes as much.
* Garlic, lots of garlic. I gladly would have used all of the garlic in the picture, but Alex vetoed. I think we used two good sized bulbs and then put the rest in the cupboard for storage.
**Not pictured: Two (or more) carrots grated into fine shreds.
In prior batches I have used broccoli, cauliflower, zucchini, basil, and hot red peppers (the dried ones that come in pizza). I personally love spicy sauce, but this time decided to make a well rounded one that can be altered to fit the dish we're making later.

Alright so now it's time to get on to the real work. First you have to wash all of the produce. (I had read some one's post about washing veggies earlier that day and decided that it made perfect sense to wash produce in soap).

After the produce is all clean you need to start skinning the tomatoes. In the past I have left the skins on, but it does lead to weird filmy bits once it's all done. The best way that I have found to skin tomatoes is to slice an X in the bottom of the tomato, dunk them in hot water for a few minutes, then pour them out in a colander and run cold water over them. It is kind of the same principle as shocking hard boiled eggs in cold water. When the tomato cools it shrinks away from the skin.
 |
If you are lucking enough to have a helper, they can begin by cutting the shallots, garlic, and peppers up for you.

(I also feel like I need to add that he took most of the pictures for the blog from here on out. I was up to my elbows in skinning tomatoes. I have corrupted him. Mwahahaha.)
If you are anything like us you will have forgotten that there is a perfectly good food processor in the cabinet. Now is a good time to get it out and make quick work of those veggies and spare your eyes in the process (I was very lucky. I was on week two of a head cold and couldn't smell a THING. This helped a lot with shallot fumes, I never had to leave the kitchen).

Now while he was cutting veggies you finished peeling the tomatoes and cut them into small pieces right?

Well now they go on the stove on medium
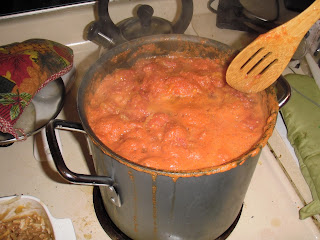 |
Back to your helper. Now that the shallots, garlic, and peppers are all diced up all you have to do is saute them in some olive oil ( I sauteed all of the peppers and half of the shallot/garlic mix. A quarter of the mix went straight in the pot raw, and a quarter went in right before I canned the sauce to keep the shallot/garlic taste fresh) and then toss everything in the pot.


All that's left is to let it simmer for as long as you do or do not want. If you do not simmer it very long it will be a little watery (this can be avoided but squeezing the seeds/juice from the tomatoes prior to putting them in the pot, but I think they have a lot of flavor) and will taste like each of the individual ingredients. It is kind of like Italian salsa. The longer you simmer it the more the ingredients break down and the flavors meld together. Ours actually burnt a little bit, but it worked out really well in the end. The sauce took on a nice smokey flavor that I'm going to try to recreate (without having to spend an hour cleaning the pots). For us this sauce yielded 2 nights of dinners, 1 day of lunches, and 6 large jars of sauce. Because the sauce is very concentrated in flavor I will actually water it down when I cook with it (so all in all it would have yielded 12 jars of sauce) but by keeping it concentrated it takes up less room in my pantry.
This was a really simple dish. The actual "work" time took less time than it took me to get all the silly pictures in order in this post, and the simmering time is completely up to you. Added bonus: your kitchen smells AMAZING.

Sorry, no burn pictures this time =D
No comments:
Post a Comment